
6 Steps to Hosting the Perfect Comparative Tasting
Hosting a tasting doesn’t have to be complicated. You don’t need a big budget, a fancy wine cellar, or a background in hospitality. You just need a plan—and a purpose.
A comparative tasting helps you learn more about wine by putting two or more bottles side by side and paying attention to how they’re similar or different. It’s one of the fastest ways to improve your palate, and it makes drinking wine more fun, not more serious.
Let’s break it down.
What you’ll learn today
- How to choose wines that teach you something when tasted side by side
- How to structure the tasting so it’s simple, not stiff
- How to guide the experience without overexplaining anything
Step 1: Choose a Theme That Makes Comparison Easy
The whole point of a comparative tasting is contrast. If your wines are too different, it’s overwhelming. If they’re too similar, you won’t learn anything. So pick a theme that gives you one clear point of comparison. That could be:
- Same grape, different region (e.g., Syrah from France vs. California)
- Same grape and region, different winemaking (e.g., oaked vs. unoaked Chardonnay)
- Same grape and vintage, different price (e.g., entry-level vs. premium Barolo)
Start with just two wines. More than four gets hard to follow. Think about what you’re curious about, and let that shape your theme. Your goal is to set yourself up to notice differences—not to stump your guests or show off obscure bottles.
Write your theme down in a sentence. It will help you stay focused and help your guests stay grounded. This isn’t random wine drinking. It’s a learning experience.
Step 2: Pick the Right Wines for the Job
Once you have your theme, choose wines that make that theme clear. This isn’t the time to grab whatever’s on sale. You want each bottle to support your point of comparison. For example:
- If your theme is “Old World vs. New World Pinot Noir,” don’t pick a funky natural wine from Oregon and a super traditional Burgundy—they’re both outliers.
- If your theme is “Oaked vs. Unoaked Chardonnay,” try to get wines from the same region and price range so oak is the main variable.
Keep the number of wines low—two is ideal, four max. Label or number each one clearly so guests can track what they’re tasting.
Finally, don’t get stuck chasing perfection. You’re not building a wine list. You’re setting up a conversation.
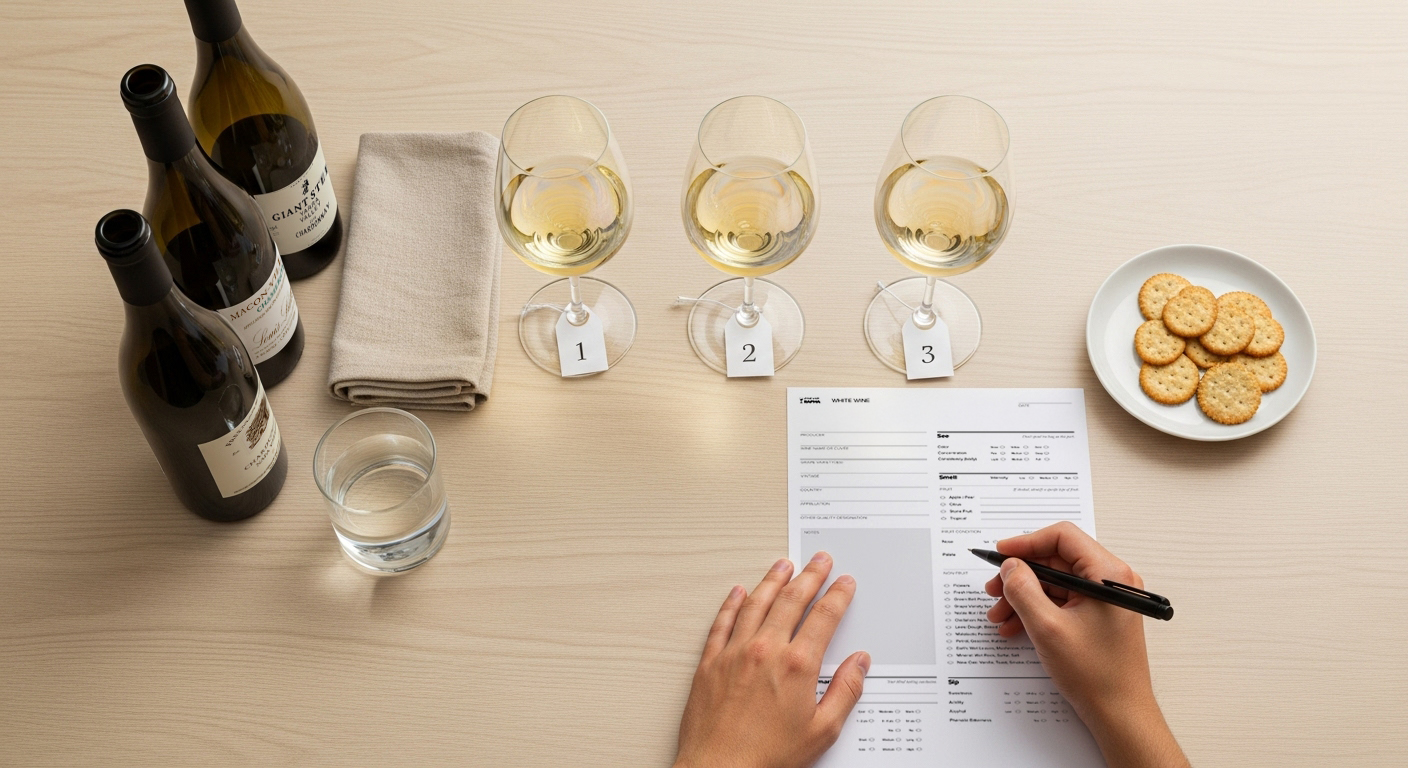
Step 3: Set the Table for Focus, Not Formality
You don’t need a big dining room or perfect glassware to run a great tasting. But you do need a setup that helps people focus.
Here’s what to prepare:
- Use the same type of glass for each wine.
- Set them in a row so people can taste back and forth.
- Use a white tablecloth or sheet of paper so the color of the wine is easy to see.
Give each person some water, plain crackers, and a small dish or cup to spit if they want to stay sharp. Label the wines by number or letter—not by name—so people can taste without bias.
Set the mood to encourage learning. Turn down loud music, keep the lighting bright, and make sure everyone has a seat.
Step 4: Guide Your Guests Without Overexplaining
You don’t need to be the teacher—but you do need to set the tone. Start by telling everyone the theme. Then explain what they should be noticing. You can keep it simple:
- Look at the color
- Smell what stands out
- Taste slowly and go back and forth
- Think about texture, weight, flavor, and finish
Give people 5–10 minutes to taste quietly on their own. This helps everyone focus and form opinions before the discussion starts. You can hand out a simple tasting sheet with space for notes—I recommend my [tasting worksheet]—or just ask them to jot a few words on paper.
Don’t overload people with wine terms. This isn’t a quiz. It’s about what they notice and what they enjoy. The more relaxed your tone, the better the conversation will be later.
Step 5: Taste in a Thoughtful Order
Don’t just dive in at random. Order matters. You want to taste in a way that helps your palate stay fresh and your brain stay focused.
Follow these simple rules:
- Start with lighter-bodied wines before moving to fuller ones.
- If one wine is much higher in alcohol, taste it second.
- If you’re comparing red and white, do white first.
Let everyone taste each wine side by side. Don’t rush through it. Go back and forth between them. Take small sips. Smell again after tasting. This is where the real learning happens—when you compare directly and slowly.
Encourage people to talk about what changed as they tasted. Does one feel more acidic? Is one more aromatic? Is the finish longer or shorter?
You don’t need a strict script, but you do need a sequence. A little structure helps everyone stay on track.
Step 6: Open Up the Conversation
Once everyone’s had time to taste and think, bring the group together. You don’t need to lead a lecture—just ask good questions:
- What stood out to you?
- Which did you prefer and why?
- Was there anything surprising?
Use open-ended prompts. Avoid asking people to guess where a wine is from or how much it cost. That creates pressure. You want curiosity, not competition.
Let the conversation flow, but keep it grounded in observation. You’re not just drinking—you’re noticing, comparing, and learning. That’s what makes the tasting worthwhile.
At the end, recap the theme and what you discovered. This helps lock in what you learned and encourages people to pay closer attention the next time they open a bottle.
The more you do this, the sharper your palate will get—and the more confident you’ll feel.